Hi all,
I went out on an extended 4 day walk this last weekend. The aim of the trip was to visit a series of remote wilderness areas in the Bimberi Wilderness. This area contains many high value summits in the VK1 / ACT area for Summits on the Air, and my plans were to activate 10 of these summits.
Mt Ginini VK1/AC-008
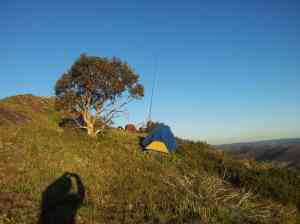
Mt Ginini is located about halfway down the western side of the ACT border with New South Wales. There is a road coming in from Canberra, and another through the Brindabellas from Tumut. Coming from Melbourne, the Tumut access route was the one I chose, and the road is sealed, except for about 30km. It is a good high standard gravel for the rest. Some of these sections are steep, but some seal has been put down for the worst parts. Due to this, even in poor weather, this road could still be passable in a 2WD. Mt Franklin Rd can be accessed from these roads, and this goes through several gates (locked in winter) through to the summit. One can drive right to the top, so I turned around and drove down about 50 vertical metres to ensure I was well out of the SOTA activation zone.
I put up the 2m colinear, which was attached to the fence of the Air Services Australia site. The metal did seem to affect the feedpoint impedance of the antenna a little, but it still worked quite well. I put out a call on a repeater that services the VK1 area, VK1RGI. This repeater itself is located at Mt Ginini. A number of stations came back, most of which would become like old friends over the coming days.
Here’s a look at the peak in the late dusk light:

Mt Ginini
With that, and a few big days ahead, I drove down to the track head near the summit for access further south. I camped there the night for a early 6:45am departure the following morning.
Mt Gingera VK1/AC-002
This summit is the most accessible 10 point summit in VK1. Access is via a continuation of Mt Franklin Rd as a MVO track. It’s about 5km to the start of a walking track that heads up to the summit. I dropped my phone on the track, and that was my camera – so no photos. I did recover it on the way back down – so at least there are more photos to come. I did at least get a picture of Pryor’s Hut.
The summit has a few small boulders plus some low snow gums, so it was reasonably sheltered from the wind. There are good views to the south west from here, with Mt Jagungal clearly visible. I remember doing an activation of that mountain a few years ago, but those were pre-SOTA days. It awaits my return when SOTA comes to VK2.
Again, the 2m colinear worked well here, and the VK1 chasers came up quick after a call was put out on VK1RGI. The feedpoint impedance of the 2m colinear was back to normal, with the FT-817 showing zero SWR bars most of the time.
Mt Ginger Ale VK1/AC-007
This summit is also accessible from what is now the Mt Franklin fire trail. Apparently this track is to be upgraded for fire management purposes, but I do not imagine that it will be opened to vehicles.
There is no track to the actual summit. I walked to a point about 700m south of Blackfellow’s gap, where the track stopped climbing and dropped my pack there. The top of my pack can be used as a small day pack, so I had my radio gear in there for the climb up to the summit, using the squid pole as a walking pole. It’s not as good as a real walking pole as a walking pole.
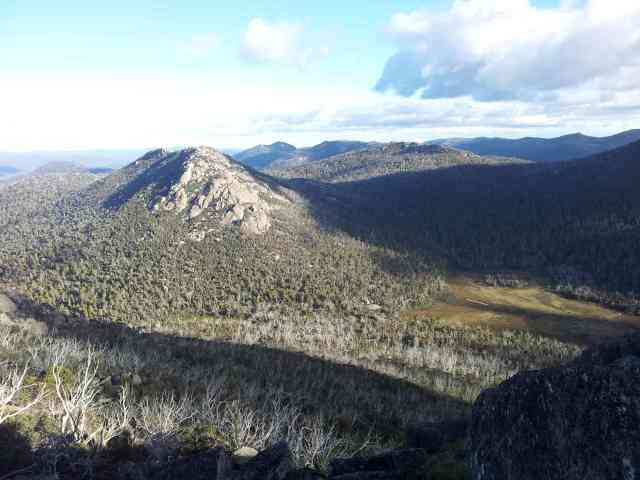
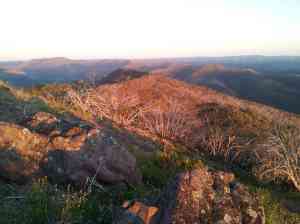
It’s about 260m vertical climbing through light scrub to the summit. There’s a few false tops along the way. Here’s a pic taken near the summit:

North east from Ginger Ale
I worked Andrew, VK1NAM from VK1/AC-021 on the way up, just before UTC midnight, and then again summit to summit from the top. Again, the colinear worked a treat as it would until near the very end (it still worked, it just was a little sore from the beating it was to take)
I could hear VK3AFW calling for me on VHF CW, but he could not hear me. It was still a highlight to hear such a DX signal coming in.
Bimberi Peak VK1/AC-001
Next up was the ACT’s highest summit. First on the agenda was to draw water, which I did so at the junction of Laura Gap Trail and Mt Franklin Fire Trail. The next item, how to access the summit. Options were: 1) to take Leura Gap Trail up to the gap from the junction of Mt Franklin Fire Trail, 2) to go straight up from the junction, or 3) go about 1km to the east on Leura Gap Trail and take the next spur up. I went for option 2. I still am not sure about how options 1 or 3 would go. It was thick going with different types of scrub transitioning at 1400m and then some real rocky progress at around 1700m. This really slowed me up. Above 1700m, it’s clear. By that stage, I was quite tired and was experiencing cramping. I had to take it slow and easy up to the summit, set up the tent and then activate the summit, again using the colinear on 2m.
Here’s looking north from about 1750m altitude:

Looking north from Bimberi Peak
I did finally make the summit itself:

Camping and operating from Bimberi Peak summit
And here’s the view in the very late light.

Looking north from Bimberi Peak summit
Mt Murray VK1/AC-003
And so the tour continues. I aimed to leave on first light and headed down, first a little to the west of the spur, but I made my way back on. The trick would be to leave south east, not south from the summit. It was good progress with light to medium forest down to Murray Gap. Much easier going than the previous day. Down there, I met some campers who were planning on ascending Bimberi Peak. Parks management had recently put a new sign in to mark Murray Gap, and hid the old one in a few trees:

Old sign for Murray Gap
I then headed straight up towards the summit of Mt Murray from there. It was steep, but the forest was open, so it was good progress right to the top. Here’s a view from the summit:

North east from Mt Murray
I then headed south east to a marked stream to get some water and then headed towards Yaouk Gap. The scrub started getting bad at around grid ref 632463, and it was just short of 2km of scrubby stuff which took about 2 hours to get to Yaouk Gap. Not looking good for Mt Scabby tonight.
Mt Scabby VK1/AC-005
From Yaouk Gap, this could be accessed by traversing along the ACT/NSW border which goes along Scabby Range, or heading south into NSW on Kennedy’s Rd – although I am not sure if some of this is on private land. Maurice Luton Trail proceeds parallel to Scabby Range and gets within 2k of the summit (but all the climbing still needs to be done). The climbing part is a moderate to heavy scrub bash all the way up. Going along Scabby Range is worse, some parts in there were not good at all, with progress down to 500m/hour. With so much time lost, I had to give up on activating Mt Scabby on the Saturday, instead aiming to make camp near water and activate the summit first thing the following morning. I ended up getting into the head waters of the Cotter River, just below the summit at 8:30pm and made camp there, well after dark.
The next morning, it was just a short walk up from camp to the SOTA summit.
Here’s a look at where I camped:

Camping underneath Mt Scabby
There was a VHF DX net on 144.2 that morning. I could hear many VK3 stations, but I could not work any of them. There were a few distant VK2’ers that went in the log, aside from the usual. I could not hear VK3HRA, but VK1NAM worked him on aircraft enhancement that morning.
Mt Kelly VK1/AC-004
Onward we go to Mt Kelly. Progress here was faster than yesterday, with odd scrubby sections, but mostly open. Here’s looking north from the Mt Scabby area towards Mt Kelly:

Mt Kelly from near Mt Scabby
There is a lake marked at 688430, but it was dry. I had planned to camp here, lucky I didn’t. There was some water about 500m to the south, and likely water 500m to the north west.
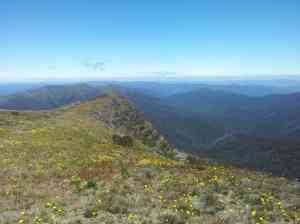
From there it was moderate going up to Mt Kelly. Progress seemed to be faster on the western side of the ridge. There were some nice views from the summit:

South east from Mt Kelly
After the activation, again using the 2m colinear, I headed down the eastern slopes of Mt Kelly. The scrub was thick in places, but it is easier going down than up. There was a large open area between Mt Kelly and Mt Namadgi called Rotton Swamp. It was not really a swamp, and the water I got from there was quite nice.
Mt Namadgi VK1/AC-006
From Rotton Swamp, it was time to head up Mt Namadgi. There seemed no obvious good way up, and the scrub was simply shocking in places, with progress down to a metre a minute at times. After about 2 hours of scratches, bashing and feeling exhausted, I found a large rock face to start heading up. The last 100m vertical was very steep, but progress was much faster than the scrub lower down. With significant time lost, I decided not to get out the colinear for this activation, instead activating simply using the handheld with it’s 1/4 wave antenna on FM only. This was more than enough.
I got this nice view of Mt Burbridge and “Rotton Swamp” on the higher slopes of Mt Namadgi:
Mt Burbidge and Rotton Swamp from Mt Namadgi
Mt Scabby can be seen in the above pic, in the centre but in the distance.
Here’s the view looking north from Mt Namadgi:

North from Mt Namadgi
Before dropping off the summit plateau, I found this interesting Aboriginal site, which you can read the sign for yourself:

Aboriginal initiation site on Mt Namadgi
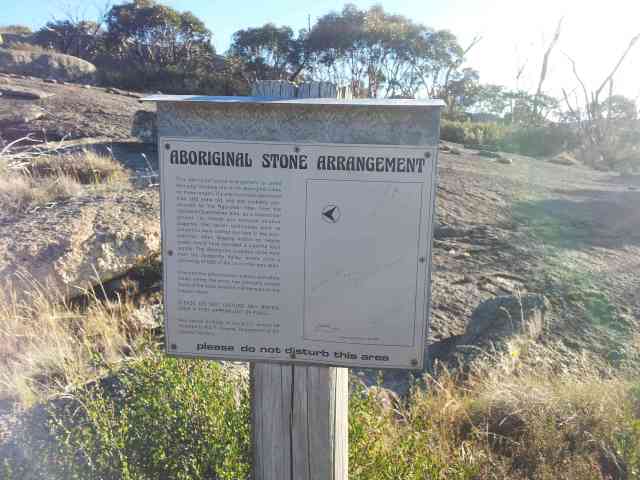
Interpretive sign at Aboriginal initiation site
With that, it was a drop down into the next valley to camp for the night. It was tough going to get started, but then the forest moderated. It was not open forest, but certainly less bad than what had been experienced earlier. It was good to have a little rag chew with Matt VK1MA on the VK1RGI repeater from inside the tent after another long hard day.
Mt Mavis VK1/AC-011
Next morning, up to leave at first light and to climb Mt Mavis. The first part of the climb was semi-open forest, but it didn’t last. The top of the mountain was not open, with heavy thick scrub, with lots of dead wood to make it harder. I ended up activating on a large bolder.
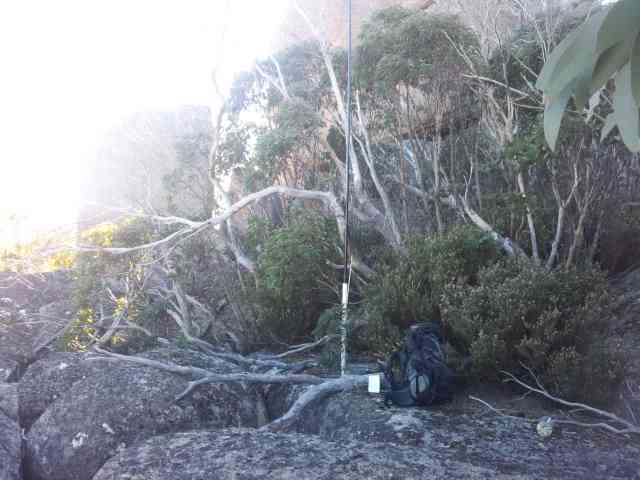
Activating at Mt Mavis
The colinear showed some signs of wear and tear at this activation, with a short developing. I was able to massage it to keep it working. The fix will be straight forward, by further reinforcing the joins on the 1/4 wave aluminium pole that joins at the feedpoint. It is this section, rather than all the soldered inner conductor to shield solder joins, which takes much of the physical stress, both in deploying the device, and during the large amount of scrub bashing that had been going on. I also secured the coax using some tape against the other end of the 1/4 wave pole to reduce the stress on this connection, and that had failed. I’ll just use more tape to make it physically secure, but still, this thing had preformed well – it still did this activation here – and it had taken an incredible amount of physical punishment.
A note about the squid pole. I had long lost the rubber stop at the end, but had replaced this with a rubber foot for chairs that Bunnings sells. That works much better for scrub bashing. I also put the squid pole in a 1m 50mm PVC pipe to protect it, and given all the scratches on this pipe, it is doing it’s job! I have reinforced the top and bottom of the largest squid pole section with tape. Even with all the scrub punishment, the squid pole shows no sign of harm.
After the activation finished, it was time to get out. I had hoped to work Micheal VK1XYZ from Bimbiri Peak s2s, but it was not to be.
Here’s a last look at the top:

Summit area of Mt Mavis
Getting out meant dropping down from the summit, aiming for grid ref 744501 in the valley. I ended up working Michael from Bimberi Peak after 45 min of descending. I was very surprised about this because I was on the wrong side of Mt Mavis from him. It was a weak but readable signal. I also expected to lose the VK1RGI repeater, but did not lose it at any time. It was weakest at Murray Gap (with Bimberi Peak in the way), but still 1 watt from the HT from there could easily open it, I’m sure 5 watts would be readable.
It took nearly three hours to get down, with heavy scrub nearly the whole way over a 600m drop. The valley was easy going, with good water in the river. The track also goes up the valley further than marked on my map. I picked it up at around 750496. It crosses the (then small) river twice, but ends up on the western side of the valley heading downstream. Here’s a look at the lower valley:

Heading home down the valley
From there it was not long before Andrew VK1NAM and myself caught sight of each other. He had come to pick me up and ferry me back to the car. It was a change of plan from the original, but neither AC-006 or AC-011 would have been possible without it.
It was quite a big trip, with some days having nearly 12 hours of walking, but the summits are in the log, the views in the memory and taken with the camera, and that’s what counts.
Regards, 73 Wayne VK3WAM
Postscript: Equipment review
I took up three 2.2Ah LiPOs and used just short of two of them. One activation was done on the internal battery, which was used up about 50%. The Mt Ginini activation was done using a 18650 Lithum Ion pack, which I generally use on QRP activations, but that was not far from the car. I did that to keep the three LiPOs fresh for the pack carry part. The radio was a FT-817, generally operated at 5W.
I used a Wouxun HT for my comms to the VK1RGI repeater. By the end of the trip, I had gone through two 1400mAh packs, and had started on a 1700mAh pack. Most of the time I had this on 1 watt for the repeater, and 146.5 FM simplex at 5 watts. I really only used it on Mt Namadgi for actual activations, plus a few ones to chase others while I was transiting between peaks.
Sorry to the VK3 guys who might wanted to have got these summits. I would not carry a yagi for horizontal polorisation into this country. I did have the end-fed for 40m, but time did not permit putting it up.


You must be logged in to post a comment.