Mt Bullfight, Pyramid Hill and Bill Head revisit

Hi all,

On the 10th of August, I headed out on a SOTA trip to attempt to clock up some decent points with the winter bonus. This trip was a repeat of a trip last year, but a year’s experience and improved gear makes a difference. I’ll discuss some of the differences towards the end of the post.

Mt Bullfight VK3/VN-002

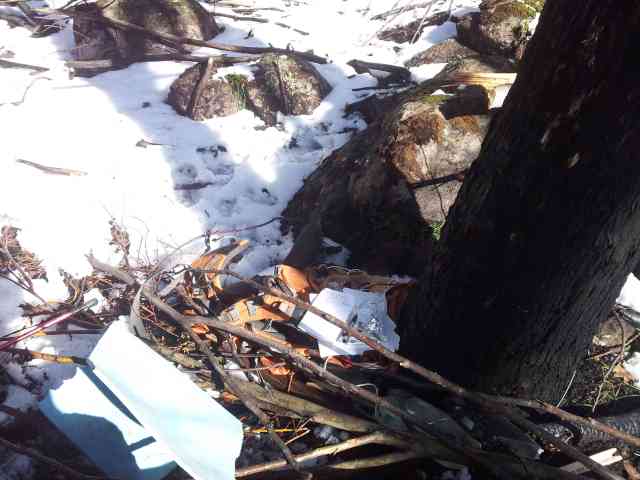
First up was Mt Bullfight. I left the car in the same position as I did on the last trip, at the junction of Snobs Creek Rd, Coy Rd and Conn Gap Rd. Heading up the Bullfight track to the west was easy going, and the plan was to take the same route to the summit, or at least into the activation zone as last year. There was a lot more snow this year, with about 40cm on the ground at the operating location. The first snow was seen at about 1100m on the way up. There is little point trying to take the track up with this amount of snow. I was quite glad I brought the foam mat to sit on during the activation.

I ended up activating about 100m or so from the summit, about 15m vertical down from the summit height.

Operating at Mt Bullfight

Operating at Mt Bullfight

The sun was starting to come out, so even though there was more snow, conditions were nicer than last year.

The early morning sun breaking through the trees at Mt Bullfight

The early morning sun breaking through the trees at Mt Bullfight

Pyramid Hill VK3/VN-005

Unlike last year, I decided to head back to the car and drive up to the No 5 track and Royston Range Track junction. The road is in good condition for 2wds. This allowed me to skip some off track walking. This certainly saved some time, and it was only a shorter 140m vertical climb up to the top. There was still some snow around, patchy in places, but 10cm continuous ground coverage in others.

Operating location at Pyramid Hill

Operating location at Pyramid Hill

Conditions were ok, there was one or two showers in the area. Sounds a lot better than stories of people being blown off the hill here!

Bill Head VK3/VN-004

Given that there was some snow on Pyramid Hill, there would certainly be snow on Bill Head. I decided to try Conn Gap Rd from the northern end, rather than the southern end as I did last year. The road is a little rough, but quite passable in a 2wd up to Conn Gap. With snow melt, it was very wet, so if I can get a Prius up here at this time of year, I should be able to get it up here at just about any time. I was not prepared to drive down the hill on the other side of Conn Gap, because it’s ok to see how far you can go when going up a hill on the way in, because it is always easier to go down than up.

From Conn Gap, I walked along Conn Gap Rd to point 067606 and then proceeded SW to the ridge. Going up to the ridge was a little slow with some of the dead timber from the regrowth from the Black Saturday fires in 2009. Along the ridge top itself it was easy going up to the summit in about 15cm snow.

It was nicer operating in the light, rather than in the dark last year. In July last year, SOTA was not well known in Australia, so it was a tough hall getting the four contacts – with two ZL’s and one VK6 making up the four. This time, it was the usual pile on 40m, so no problems in activating.

As it turned out, I have finally used the walking pole as part of the antenna. I wedged it behind a rock and tied a rope with feedpoint of the end fed on it.

Walking pole forming part of the antenna at Bill Head

Walking pole forming part of the antenna at Bill Head

Bill Head looks nice under the snow.

Bill Head summit

Bill Head summit

Wombat Spur VK3/VN-014

With Bill Head done, there was still plenty of time to go and get the bonus summit for the day. Wombat Spur is in the Eildon National Park. Access is via Jerusalem Creek. The road is a good quality 2wd track until the crossing of Jerusalem Creek. From there, there is a sign saying 4wd only, but the road is still quite good. I was able to drive the car all the way up Taylors Creek Track to a locked gate at point 115720. From here, when accessible out of the winter closure period, the track is definitely 4wd only. For me, it was still only a short walk up to the summit. Conditions were pleasant up here, and as it was lower down, dry due to no snow.

Some of the activations today had quite high QSO totals, but this activation came in at 36, which is a record for a non-contest, short period activation. Still, the pile was reasonably easy to manage. This does rely on chasers not calling out of turn. For activators out there, it remains a good thing to call for summit to summits every so often.

Wombat Spur

Wombat Spur

I was able to pack up and get down on to the sealed road before nightfall. All in all, a good day.

Review vs last year

  • One of the biggest differences this year is the greater awareness of SOTA. Many more people are specifically chasing SOTA, while in July 2012, it was still quite patchy. A year makes a big difference.
  • End fed vs an inefficient vertical: I still use my vertical on some activations, but having the ugly balun and the ATU on the feedpoint makes a big difference. The efficient vertical is still down on a (sort of) horizontal antenna for close in contacts, but perhaps an s point or 2. Last year I was well down. Getting the antenna efficient is quite important when operating QRP.
  • Having an antenna that can be quickly erected is important, both for put up and take down time. A year ago, I was not yet using squid poles. I was guying up an aluminium pole that needed guying to stay up. Even when using the vertical, I am using a squid pole based antenna these days. The end fed is very fast to put up and take down, less than 10min for each, vs 30 to 45 minutes for my setup twelve months ago. Even now, the vertical does take longer because the radials still have to be put out. My vertical arrangement now is about 20 minutes setup and 15 minutes takedown.

So with all of that, I was able to activate four summits easily in daylight, vs last year where I could spend 2 hours on summit, calling CQ, CQ, CQ and hearing just noise most of the time.

It is great to look back at these activations and see not only 36 contacts in little more than half an hour, but there is lots of fun getting up and back – both on foot and in the car.

Regards, Wayne VK3WAM

Improving the backpackable vertical antenna

My SOTA activations on HF use a vertical antenna which is all home brew. I decided on using a vertical because:

  • I wanted an antenna that could be used anywhere, whether there were lots of trees or not.
  • It needed to be able to be disassembled into segments no longer than 75cm in length so they could be put into a backpack. Some SOTA summits need significant off-track walking to access, and carrying a large 1m or more item outside the backpack – including being strapped on – was not a great solution for those situations.
  • I wanted something with a low angle of radiation to work SOTA DX. Perhaps this would be at the cost of working local stations, but if the antenna was efficient enough I should still be able to work local, but get the DX as well.

Bunnings sell cyclical al in 10mm, 12mm and 16mm segments – and larger. By using the workshop at my radio club, I have cut these to size.

State of play in June

In June, I had a 6 summit activation long weekend in the Grampians. The final activation was at VK3/VW-007 Near Baroka Lookout. Allen, VK3HRA joined me for the second half of my activation. I was working 20m DX on CW while he worked 40m SSB. Some stations he worked had also worked me earlier on 40m, so I was very interested in his signal reports, which were generally about 2 points higher than mine. It’s not a contest about who has the best antenna, but when conditions are poor, a better antenna could be the difference between a successful activation or not, so it was time to do some work.

Allen was using a Buddistick with one radial. Now some get into the counterpoise vs radial wording thing, but at the end of the day it is about providing some kind of ground to minimise ground losses with a vertical. Now both our antennas were short for 40m, but mine was less short. I also had eight radials! So why the poor performance? His antenna was loaded, mine was unloaded. Answer: Rather than relying on an ATU to match the antenna because because of the short capacitive reactance, I needed a loading coil. Time to make one.

The Loading Coil

I like working multiple bands, and putting a loading coil on the antenna could restrict me to one band, and this would not do. The loading coil needed to be tapped, so I could bypass it, also select tapping points suitable for various bands. With 8 segments, the antenna is 6m long – longer than a 1/4 wave on 20, but short on 30 or lower. I used an online inductance calculator at Hamwaves, designing it on 50mm PVC pipe with a flat piece of aluminium to allow it to be screwed onto the antenna at one of the coupling points. I had already made up a piece of wood about 100mm long with two M8 screws at either end, so this was perfect to mount the coil. The coil would be long enough to have enough turns to resonant the antenna on 80m, as well as making tapping points lower down to resonant the antenna on 30 and 40.

My plan was to put the coil between segments 2 and 3 on the vertical, about 1.5m up from the feedpoint. On the net, and in NEC2 modelling I had done, having the loading coil up as much as possible is better, but it needed to be low enough that I could physically access it to change bands without needing to lower the antenna. I would still use an ATU, but this would be more about matching the resistance, rather than having to deal with all the reactance as well. A short antenna has a feedpoint resistance well below 50 ohms – even 1/4 wave is about 36 ohms, and shorter is lower. As the ground plane is improved, this resistance is lower than otherwise, leading to greater mismatch – but this is good because the missing resistance is missing ground losses. The job of the ATU is to match for this mismatch, but the losses across the ATU would be small.

First use in anger VK3/VC-003 Mt Richie

Now with my new loading coil, it was time to get it into action. Mt Richie was the first activation, with Mt Donna Buang VK3/VC-002 later in the day. Reports on 40m were a good two to three s points up on the usual, with many stations reporting that I had a good signal, rather than the usual “I’m digging you out of the noise”. So it looks like I’m better in the game. I could also tell during the setup that when I tapped the coil on 40m at a suitable tapping point – the radio was hearing a lot more signals. Loading a short antenna certainly seems the go.

One impact of the loading coil was that I could not use the antenna with 8 segments. The loading coil added enough weight that the antenna, despite 2 sets of guy ropes, could not stay up. I had to use the antenna with only 7 segments – 5.25m high from the feedpoint.

The Bunnings 10mm segments were just too weak and I needed something stronger. I had used 16mm segments for something else, but I was not that happy with how ridged it was either. I made up two 16mm steel segments with some 10mm aluminium tubing inside for the M8 threads. The 10mm tubing was held in place by a 6mm nut and bolt about 10cm up from the coupling. This has worked well in my experience, and makes the couplings stronger than other parts of the antenna. This approach would allow me to have a drop in replacement for the bottom 2 75cm segments on the vertical, and should get me back to an 8 segment antenna with the loading coil.

Rubicon forest triple activations

A few weeks after Mt Richie and Mt Donna Buang, I was activating three summits, Mt Bullfight VK3/VN-002, Pyramid Hill VK3/VN-005 and Bill Head VK3/VN-004. Conditions were poor on 40m to say the least, with a large skip zone during the day and attenuation on hops on 40 during the day high. If it was not for the loading coil, I would have not got away with the points from the three summits that day – as described in by blog post. I might not even got a single contact on some of those summits.

By now, I had used the stronger steel segments down the bottom of the vertical, and these had made the antenna structurally sound. There was no buckling anywhere lower on the antenna, which was the reason it used to fall over.

While conditions were poor, and a few days later, Peter VK3PF only got two contacts from VK3/VT-003, underlying the challenge, it made me think that things are still not quite right.

Further improvements

I had always not put the ATU actually on the feedpoint, but somewhere on the ground nearby. This was because the antenna would not be able to bear the weight of the ATU – it does not weigh much, but I was always struggling with the structural integrity of the antenna. My two steel segments seemed to have resolved that problem, so now I have begun to think it is time to put the ATU directly at the feedpoint.

When I first started doing portable activations with this antenna last year, I first had a 10m run of coax from the ATU to the feedpoint, with the radio near the ATU. It is convenient, but performance was terrible. I then had a short, 1m bit of coax from the feedpoint to the ATU, and then a longer run to the radio. This worked better. It does not significantly matter how long the run is from the radio to the ATU. It is all about what is between the ATU and the feedpoint and coax here is bad.

So I built up some homemade twin line from enamelled 1mm wire I had available. The run was 4 metres long. It was this length because another vertical I had been using has a feed point 1.5m off the ground. Even with my 8 segment vertical with a feed point 30cm off the ground, the 4 metres of twin line worked much better than 1 metre of coax. There was nothing wrong with the coax – I could use it quite happily between the radio and the ATU!

Still, the antenna is unbalanced and so is the tuner, and twin line is a balanced transmission line, so running an unbalanced signal down it must not be good. I built two Guntella 1:4 baluns, one to go at the tuner, and the other at the feedpoint. This further improved things – there was evidence before of RF at the radio, and these baluns removed it, also my RX was much better – further evidence of common mode currents before. One time I forgot a balun, and using the setup without them was certainly worse than what I was used to.

Reading W2FMI Jerry Sevick’s Transmission Line Transformers made me think that I still have not got this thing quite right. The Loading Coil gets rid of capacitive reactance, but it can not be said that there is 50 ohms on one side of the balun and 200 ohms on the other. This would mean that the losses of 0.05db that I had measured using a network analyser on these baluns would not be the case because of these mismatches. Over the Gippstech weekend, I did some Keith Roget activations at 100 watts in Morwell National Park and Tarra-Bulga National Park. The baluns got warm. Not hot, but the hotter one had it’s temperature raised about 20 degrees. This tells me that the loss is much greater than 0.05db, more like about 2 to 3db. There are two of these baluns, so there is 4 to 6db of signal improvement waiting to be taken.

So my current plan of attack is to do the following:

  • Put the ATU directly on the feedpoint of the antenna, now that the steel segments have removed the instability problems. Get rid of the twin line and the two baluns. The ATU is unbalanced, feeding an unbalanced antenna.
  • There will be some common mode currents reintroduced because the baluns are gone, and we do not want these. We certainly do not want them anywhere near the radio, but across the ATU is not such a big deal. So a 10 turn on 50mm PVC pipe Ugly Balun with coax – which is really a 1:1 unun will do the trick.

This Ugly Balun will get rid of the common mode currents that run on the outside of the shield, but because it is made of coax, the inner conductor and the inner surface of the shield are unaffected. There will be enough reactance on the Ugly Balun to block common mode currents even at 80m, but not too many turns to not work at 10m. Being on the radio side of the ATU – but right next to the ATU, means that the RF inside is going along a matched transmission line with low SWR, so the loss of this Ugly Balun should be very low.

That’s the plan, we’ll see how it goes at the next activation.

Regards, Wayne VK3WAM

SOTA Activations of Mt Bullfight, Pyramid Hill and Bill Head

I received notice that there would be an interruption to our power at home on Tuesday, so it was time to hit the hills. I had looked at these three summits and thought it would be possible to activate all three in a day, so lets hop to it.
My plan of attack was to drive up on Monday night and sleep overnight near the first summit in the car. I headed up past Marysville and Lake Mountain and headed onto the Eildon Warbuton Rd. This was a nice gravel road to start off with. I made my way up to Coy Rd – but alas – a large tree had fallen over the road. Even a chainsaw would have not helped here. So back down to Eildon Warbuton Rd and continue trying northwards. Again another tree across the road. If I had a chainsaw, I might have got through this one, but no, turn around and go all the way around through Buxton to Snobs Creek Rd. This added two hours, and my planned early morning start would need to be pushed back a little given I was now going to bed at 1:30am rather than the planned 11:30pm.

Mt Bullfight VK3/VN-002
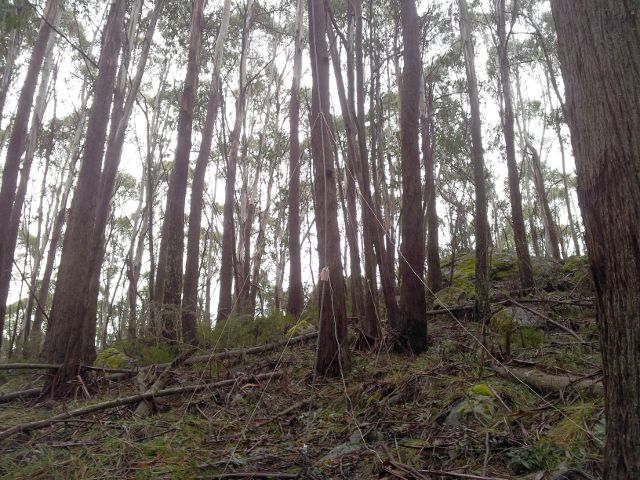
Still, I got up just before 6am and headed up Bullfight Track to a high point north of the summit itself. There is actually a flagged route from near here to the summit, but I did not know of it on the way up, but used it on the way back. Still, it is of little use, following your nose could be a better option. The forest floor is quite open and progress is quite good. The picture following shows the open forest floow near the summit. There was patchy icy snow from about 1400m up.

Propagation was poor from the top. On 40m I was unable to contact anyone from VK3. It took about 2 hours to get the required 4 contacts to obtain the points from the summit. Sometimes life is not easy QRP, but still the FT-817 is a great rig.

Pyramid Hill VK3/VN-005

Next up was Pyramid Hill. I headed down toward Bullfight Track much the way I came, but trying to follow the flagging tape of the route. Next time I might not bother with this. Upon hitting the road, I headed back towards the car at Snobs Gap, but then left the road at its northern most limit, and headed off track for about 1km towards the next track. I made my way through an area that had recently been logged. It makes me wonder why they don’t remove more wood than they do, at least woodchip it. The area had been burnt as recently as 2 months ago, which I presume is to aid regermination.

Royston Range Rd is used to get most of the way towards the summit – this track is closed during winter, but during summer a 2wd could get up this easily. The last 300m is on a steep 4wd track which gets within 15 vertical metres of the summit. I operated about 5m below the summit on the eastern side to try and avoid the wind that was howling quite worryingly. A picture of the vertical antenna is shown below:

Antenna setup at Pyramid Hill VK3/VN-005

Again, the propagation was poor. 20m was like the antenna was disconnected. 40m did not sound so much better, but the presence of strong signals from VK2 and VK5 told me that it was not the antenna. Like at Mt Bullfight, it was a 2 hour slog to get the required 4 contacts. Again, no VK3, with a skip zone of several hundred kms on 40m. I tried a little CW on 20m but it was a waste of time.

Apart from the long activations setting me behind my planned time schedule, I was also starting to have problems with the tapped loading coil. I have a crocodile clip to tap the coil. This clip was not very strong, and I could tell the metal was becoming stressed and would fail soon. I needed to be gentile with it to coax it to remain in working order for the rest of these activations, otherwise I would be well down on 20 and 40m with a loading coil too big.

After getting the 4 contacts, it was time to walk back to the car, on track, but a distance of nearly 8 km. It took about an hour and a half.

Bill Head VK3/VN-004

The idea with my last activation was to use Conn Gap Rd to drive the car to a point north east of the summit, but only 70m vertical down, do a quick climb up and approach the summit from the ridge line. I have walked here twice before with the VMTC. The cunning plan had a fatal flaw. The road was too rough for the car, and I could not get to this point. Instead, I had to turn the car around much further south. I was also worried about any future tree falls blocking the rest of the road and preventing me from getting out at the end of the day! It was nearly sunset, and from where I could get the car, I would need to climb 170m to the summit. The draw of 8 plus 3 bonus points drew me on. I arrived at the summit about 30 minutes after sunset – very gloomy up there.

Due to the dark, I took no pictures, but this was the easiest activation to setup the vertical antenna. 40m sounded much more open, now we were in the dark. Of course, if there is a skip zone in the day, it is going to be bigger at night. Not so big that I could not get at least some contacts. The struggle to get the 4 contacts is not so much about having a signal that cannot be heard, it is that there were not so many on the band. I had two CQ call answers, but I had to tailend to get the rest, one with a ZL.

I got a contact on 40m, but then tried 80m to attempt to get the elusive VK3 contacts. My vertical is very short for 80m. The loading coil helps, but my little QRP signal with the short antenna losses is not going to overcome the s8, s9 noise floors that many suburban stations have on 80. In the end, it was back to 40 to get those contacts. Yes it was late, and I was not to get back to the car until 9:20pm but I was not leaving without the SOTA points.

Finally, it was pack up time and time to get out of there. Conn Gap rd was still an adventure, but Snobs Creek Rd felt like a freeway – except for the wildlife. I was going slow enough to avoid trouble, however.

Regards 73, Wayne VK3WAM